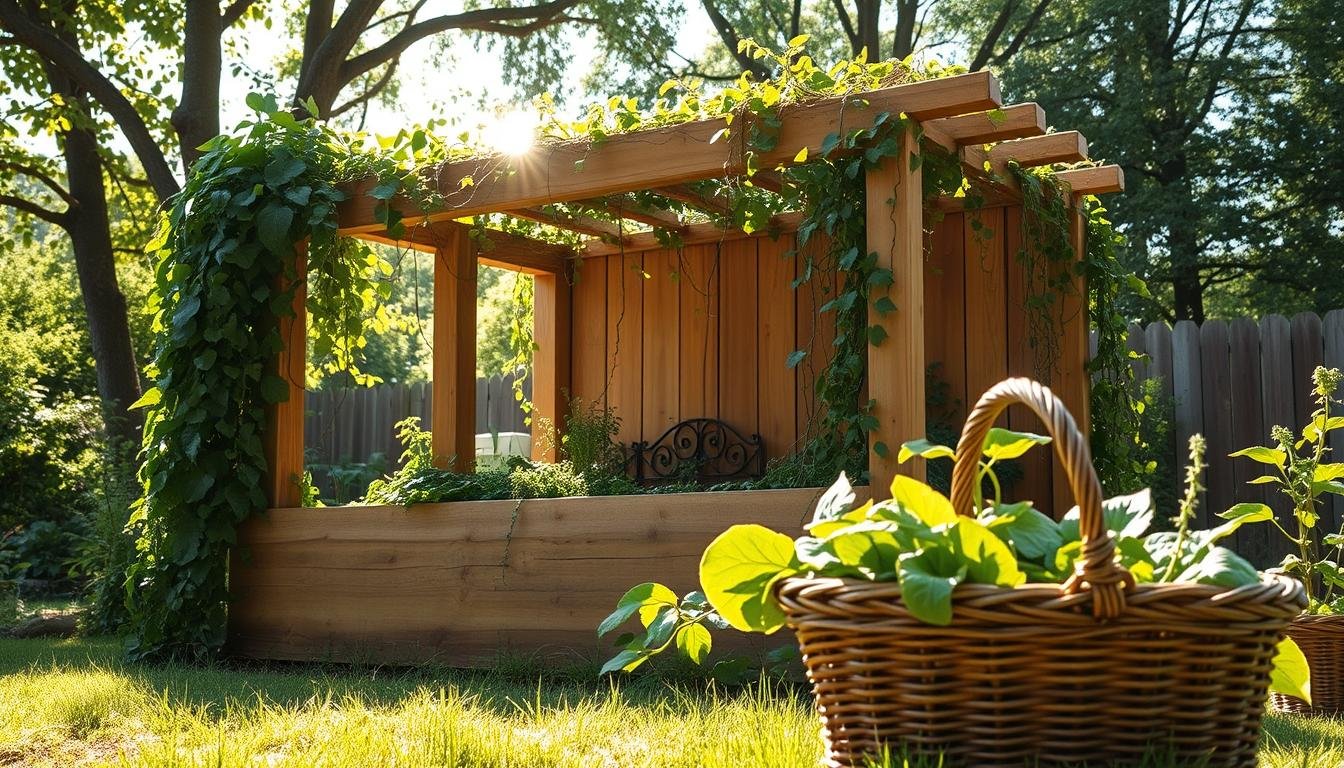
Gardening is a rewarding hobby that lets you grow your own food and beautify your outdoor space. Creating a raised garden bed is a great start. It offers better drainage, warmer soil, and easier access.
Building a raised garden bed on a budget is simpler than you might think. With the right materials and a simple guide, you can make a beautiful garden bed without spending a lot.
Using cheap materials to build your raised garden bed is both cost-effective and eco-friendly. This guide will show you how to create your own affordable raised garden bed.
Key Takeaways
- Create a beautiful garden bed without overspending
- Improve drainage and accessibility with a raised bed
- Use affordable materials to build your garden bed
- Enhance the aesthetic appeal of your outdoor space
- Grow your own fruits and vegetables with ease
Benefits of Raised Garden Beds
Raised garden beds offer many advantages, making gardening easier and more rewarding. They are popular among gardeners for their benefits.
Improved Soil Control
One key benefit is better soil control. Gardeners can mix the soil to meet their plants’ needs. This ensures the best growing conditions for specific plants.
Better Drainage and Weed Management
Raised beds have better drainage, preventing waterlogged soil and root rot. They also help manage weeds, as the soil is loose and weeds are easy to spot. This saves time on weeding and lets you enjoy your garden more.
Extended Growing Season
Raised beds can be filled with a mix that warms up faster in spring. This extends the growing season. Gardeners can plant earlier and enjoy a longer harvest. The drainage also helps avoid frost damage, extending the season even more.
Reduced Back Strain and Accessibility
Raised beds are waist-high, reducing bending and stooping. They are great for those with back problems or mobility issues. The height makes gardening easier, reducing back strain and making it more fun.
The advantages of raised garden beds are clear. They improve soil, drainage, and growing seasons. They also reduce physical strain. By using raised beds, gardening becomes more efficient, productive, and enjoyable.
Planning Your Raised Garden Bed Project
Planning your raised garden bed project is about location, size, and budget. A good plan makes your garden productive and fun.
Determining the Ideal Location
Choose a spot for your raised garden bed with care. Look for sunlight, easy access, and good drainage. Most plants need 6 hours of sunlight a day.
Make sure the spot is level and drains well to avoid soggy soil. It’s also important to be able to reach all parts of the bed easily.
Deciding on Size and Height
The size and height of your raised garden bed depend on your needs and likes. A height of 6 to 12 inches is good for roots and won’t hurt your back.
Considering Sun Exposure and Water Access
Sunlight is key for plants to grow. Watch your yard to see where the sun shines the most.
Being close to a water source makes watering easier.
Budget Planning for Materials
Planning your budget is important. Use affordable materials like pine or cedar wood. They’re durable and won’t break the bank.
| Material | Cost | Durability |
|---|---|---|
| Pine Wood | $1.50 per foot | 5-7 years |
| Cedar Wood | $2.50 per foot | 10-15 years |
| Cinder Blocks | $1.00 per unit | Long-lasting |
As Michael Dirr, a gardening expert, said, “The best garden is the one that is well-planned and well-maintained.”
“A garden is a love song, a duet between a human being and Mother Nature.”
How to Build a Raised Garden Bed with Cheap Materials
Building a raised garden bed is easy and affordable. You can use cheap materials that are also durable and good for gardening.
Affordable Wood Options
Wood is a great choice for raised garden beds because it’s easy to find and use. Pine and Cedar are two affordable options. Pine is soft and cheap, while Cedar resists rot and insects well.
Using reclaimed wood from old pallets or fencing is also a good idea. It’s eco-friendly and adds character to your garden.
Alternative Materials
If you don’t like wood, there are other materials to choose from. Cinder Blocks are cheap and good for drainage. Pallets can be used to make the frame of your bed.
Corrugated Metal offers a modern look and is durable. Just make sure it’s coated to prevent rust.
Where to Find Discounted or Free Materials
Look for materials on local classifieds, Craigslist, or Facebook Marketplace. Many people give away free materials like pallets or old fencing.
Check local hardware stores for sales or use coupons to save money on materials like wood or cinder blocks.
Cost Comparison and Longevity Considerations
When picking materials, think about the cost and how long they’ll last. Wood might be cheaper but not as long-lasting as cinder blocks or corrugated metal.
| Material | Initial Cost | Longevity |
|---|---|---|
| Pine Wood | $50-$100 | 5-7 years |
| Cedar Wood | $100-$200 | 10-15 years |
| Cinder Blocks | $100-$150 | 20+ years |
| Corrugated Metal | $150-$300 | 20+ years |
Think about both cost and longevity to choose the best option for your budget and gardening needs.
Essential Tools and Supplies
Before starting your raised garden bed project, it’s crucial to gather the necessary gardening tools and supplies. Having the right equipment on hand will make the construction process smoother and more efficient.
Basic Tools Needed
The basic tools required for building a raised garden bed include a tape measure, square, hammer, saw, drill, and screwdriver. These raised garden bed construction tools will help you measure, cut, and assemble the frame of your bed.
Optional Tools That Make the Job Easier
Optional tools that can make the job easier include a level, which ensures your bed is properly aligned, and a wrench, which can be useful for tightening any bolts or screws. Other helpful tools might include a post hole digger for deeper beds or a mallet for tapping pieces into place.
Safety Equipment
Safety equipment for gardening is also important. Gloves will protect your hands from splinters and other debris, while safety glasses will shield your eyes from sawdust and other particles.
Hardware and Fasteners
Finally, don’t forget the hardware and fasteners needed to assemble your raised bed. This includes screws, nails, and any other connectors required for your specific design.
Preparing the Site
The success of your raised garden bed project starts with preparing the garden site. This step makes sure your garden bed is stable, easy to get to, and ready for plants.
Clearing the Ground
The first step is clearing the ground of debris, rocks, or weeds. Take out any existing plants and get rid of them or compost them. This makes a clean start and stops weeds from fighting with your plants.
Leveling the Area
After clearing, leveling the area is key for an even and stable raised garden bed. Use a level tool and a rake to make the surface smooth. This stops water from pooling and prevents erosion.
Dealing with Existing Grass or Weeds
If your area has grass or weeds, you have choices. You can remove the sod, use a non-selective herbicide, or cover it with cardboard or newspaper. Pick the best method for your situation.
Weed Barrier Options
To stop weeds from growing, think about using a weed barrier. Landscape fabric is a good choice because it lets water and air in while keeping weeds out. You can also use cardboard, newspaper, or plastic. Pick a weed barrier option that matches your budget and gardening style.
Step-by-Step Construction Process
Building a raised garden bed is easy and fun with the right materials and planning. It involves several important steps to make a strong and useful garden bed.
Measuring and Cutting Materials
Start by measuring and cutting your materials as planned. Make sure you have a tape measure, saw, and safety gloves ready. Getting your measurements right is key to avoid mistakes later.
Precision is key when cutting your materials. Choose the right saw for your wood or material. A circular saw works well for lumber, while a hacksaw is better for metal or plastic.
Assembling the Frame
After cutting, start building the frame. Begin with the corners using screws or nails. Ensure the corners are square and the frame is level. Use a carpenter’s square for accuracy.
As you build the frame, check for levelness often. This prevents tilting that could harm drainage and plant growth.
Reinforcing the Corners
To make your raised garden bed more stable, reinforce the corners with extra screws or brackets. This is especially important if you’ll be filling it with a lot of soil.
“A well-constructed raised bed is the foundation of a thriving garden.”
Adding Support for Taller Beds
For taller beds, add support to stop the sides from bowing. Use stakes or extra brackets for this support.
Installing a Bottom Layer (Optional)
Whether to add a bottom layer depends on your needs. It helps prevent weeds and improves drainage. But, it can also block drainage if not designed right.
Creating Access Paths
Lastly, think about adding access paths around your raised garden bed. Paths can be made from wood chips, gravel, or brick pavers. Good paths make your garden look and work better.
Soil Preparation and Filling
To make your plants happy, you need to know how to prepare and fill raised garden beds. A good soil mix is key for plant growth.
Budget-Friendly Soil Mix Recipes
Making a cheap soil mix is easy. Mix local, affordable stuff like topsoil, compost, and peat moss. Here’s a simple recipe:
| Component | Proportion | Cost Estimate |
|---|---|---|
| Topsoil | 40% | $1.50 per cu. ft. |
| Compost | 30% | $2.00 per cu. ft. |
| Peat Moss | 30% | $3.00 per cu. ft. |
Layering Techniques (Lasagna Method)
The Lasagna method is cool. It’s about layering stuff to make rich soil. Start with cardboard or newspaper. Then add compost, leaves, and kitchen scraps. Finish with topsoil on top.
Composting to Reduce Costs
Composting is great for saving money and making soil better. Turn kitchen scraps and yard waste into a nutrient-rich soil booster.
Adding Organic Matter and Amendments
Compost isn’t the only thing you can add. Manure and worm castings are good too. They give plants the micronutrients they need and help the soil hold water.
By using these tips, you can make a great soil mix for your garden bed without spending a lot.
Planting Your Raised Bed Garden
It’s time to make your raised garden bed come alive with the right plants. Planting a raised garden bed is a rewarding experience. It needs some planning for a great harvest or a stunning floral display.
Best Plants for Beginner Raised Beds
For beginners, picking beginner-friendly plants is key. Good choices include leafy greens like lettuce and kale, tomatoes, herbs like basil and mint, and flowers like marigolds and zinnias. These plants are easy to grow and do well in raised beds.
- Leafy greens (lettuce, kale, spinach)
- Tomatoes and peppers
- Herbs (basil, mint, cilantro)
- Flowers (marigolds, zinnias, sunflowers)
Spacing and Layout Considerations
Good spacing is key to avoid overcrowding and ensure air flow. Research the mature size of each plant for the right spacing. A well-thought-out layout makes maintenance easier and more efficient.
Companion Planting Strategies
Companion planting means pairing plants for better growth, pest control, or flavor. For example, marigolds with tomatoes can keep nematodes away, and basil can enhance tomato flavor.
| Plant | Companion Plant | Benefit |
|---|---|---|
| Tomatoes | Basil | Improved flavor |
| Tomatoes | Marigolds | Nematode deterrent |
| Cucumbers | Dill | Pest control |
Starting Seeds vs. Transplants
Choosing between starting seeds or using transplants depends on several factors. Starting seeds can be cost-effective and rewarding. On the other hand, transplants can give you a head start in the growing season.
Maintenance and Care Tips
Proper care for your raised garden bed ensures its longevity and productivity. Regular maintenance not only enhances the health of your plants but also extends the life of your garden bed.
Efficient Watering Techniques
Efficient watering is crucial for the health of your plants. Using soaker hoses or drip irrigation can significantly reduce water waste and ensure that your plants receive the right amount of moisture.
Tips for Watering:
- Water your plants in the early morning to minimize evaporation.
- Avoid overhead watering to prevent fungal diseases.
- Use mulch to retain soil moisture and reduce watering frequency.
Seasonal Maintenance Schedule
A seasonal maintenance schedule helps keep your garden bed in top condition. Here’s a simple schedule to follow:
| Season | Task |
|---|---|
| Spring | Clean up debris, add compost, and prepare soil for planting. |
| Summer | Maintain watering, control weeds, and monitor for pests. |
| Fall | Harvest crops, clean the bed, and add organic matter. |
| Winter | Protect the bed from extreme weather, plan for next season. |
Extending the Life of Your Raised Bed
To extend the life of your raised garden bed, regular inspections and maintenance are key. Check for signs of wear and tear, and address any issues promptly.
Natural Pest Management
Managing pests naturally is better for the environment and your garden’s health. Methods include using beneficial insects, practicing companion planting, and applying organic pest control products.
Natural Pest Control Methods:
- Encourage beneficial insects like ladybugs and lacewings.
- Use companion planting to deter pests.
- Apply neem oil or diatomaceous earth for pest control.
Conclusion
Building an inexpensive raised garden bed is a smart way to start gardening. It offers many benefits like better soil control and drainage. Plus, it reduces back strain. By following the steps in this guide, you can make a garden that thrives without spending a lot.
Inexpensive raised garden beds are great because they let you garden easily and affordably. You can grow many different plants without breaking the bank. With the right materials and methods, anyone can enjoy gardening’s benefits.
Starting your gardening journey with raised beds has many advantages. It improves soil health and boosts crop yields. With some planning and creativity, you can make a garden that’s both beautiful and productive. It will bring joy and fresh food into your life.